Pineapple crumble or happiness vs satisfaction

I was at the gynecologist office yesterday for my annual checkup, thinking about what is an appropriate small talk for those weird moments when the person you are speaking to is replying to your vagina, when my doctor asked me if I am truly happy, knowing what I was going through recently. A year and a half ago I would have found it very strange to be discussing the path to everlasting bliss with my gynecologist but yesterday it really made me pause for a moment and think about what I want in life, what makes me really happy, what are my goals, desires?

 It’s not that I don’t want to be happy, but growing up in Poland we didn’t talk about it. It makes us Poles uncomfortable around the subject. Asking people how they are today will bring you to a long conversation about what is wrong with their lives. That’s why standard American greeting “how are you" doesn’t exist in polish small talk. If you are friendlier with someone and have time to kill you might ask “what’s cooking“ – free translation, and for 15 minutes or more you will experience a lot of … it’s good but… I call it a “butt talk “. It feels almost embarrassing to discuss happiness and demeaning to chase it. It's like having sex for the first time and asking if it was the best you ever had. Part of this is that Americans seems to have a deep aversion to negativity, this could be a positive change for me, but the pressure to remain positive all the time could be mentally very challenging. It’s good to be away from the sometimes life – sucking negativity, but I also find it hard to throw myself full gear into approach to hunting down the bliss

What is it that I really desire, money, a better job, love, a new car, traveling? Do I wish to do something big, or maybe I am satisfied with my life as it is, and don’t want to change it? I started to analyze my goals, small or big and ultimate discovered that what I really want is security, and everything I do is motivated by the desire to gain it. I desire things not because I believe new car, more money, better job will bring me happiness, but it will free me from stress, anxieties and fears. 

I use to devote a lot of time and efforts for getting something that in the end did not bring me the happiness and security I anticipated. I realized that my true happiness does not depend on possessions, and circumstances, new shoes, good sex, wonderful meal are only temporary excitements.  True security begins as a mental state, as inner strength, as faith in myself, and I also discovered that my inner happiness brings happiness and security in the material world. Sometimes is just not worth to fight and want more, it’s good to give out and make peace, it will all come back one day.

My happiness is my choice, I don’t let other people to decide either I am happy or not. It is my attitude that makes me feel uplifted, not the circumstances. I can choose to dwell on an unhappy event all day long, or I may also choose to refuse to think about it, and focus on other things that make me happy. I might not be able to change people’s behavior, but I can control my reactions, my response, and whether to let their behavior and their actions affect me. It’s so easy and so hard the same time. I learn new things about myself every day, I practice my patience with my testing me teenager and most of the time I succeed. 

Happiness is often compared to a butterfly which, when pursued, is always beyond our grasp, but which if you will sit down quietly, may alight upon you.”

Waiting for the butterfly to sit on me and to answer my OB- GYN, for the time being I will stick to satisfaction, shifting my focus from being utterly happy to being happily satisfied with all I have had achieved, and all I have and care about.

Today's recipe is a perfect example of satisfaction over happiness. I mimicked the thick, sweet, sugary filling by treating the pineapple in two ways: I  mashed half of pineapples to thicken the sauce and cut the other half into chunks for added texture. To cut down on calories, I traded sugar for coconut nectar (or xylitol ) and regular flour for almond flour . Traditional recipes have 540 calories, 23 grams of fat, and 11 grams of saturated fat per 1-cup serving. My changes brought the numbers down to 300 calories, 6 grams of fat, and 4 gram of saturated fat. I am very satisfied with the end result and the taste. 

SERVES 6

Instant or quick oats turn the topping sandy; use old-fashioned oats. Note that the pineapple pieces and pineapple chunks are cooked differently.

INGREDIENTS
   Topping  

2/3 cup (2 ounces) old-fashioned rolled oats                                                                                                1 cup mixed nuts
5 tablespoons packed light brown sugar, i used coconut nectar 5 Tbs or to taste
1/4 cup (1 1/4 ounces) almond flour
3 tablespoons unsalted butter, melted and cooled
1/2 teaspoon ground cinnamon
1/8 teaspoon salt

Filling

1 pineapple or 6 large Golden Delicious apples (8 ounces each), peeled, cored, and  halved
1 cup pineapple juice or if you are using apples apple juice
2 tablespoons packed light brown sugar or coconut nectar to taste
3/4 teaspoon ground cinnamon
2 teaspoons lemon juice

INSTRUCTIONS

1. FOR THE TOPPING: Process 1/3 cup oats in food processor until finely ground, about 20 seconds. Combine processed oats, remaining 1/3 cup oats, sugar, flour, butter, cinnamon, nuts, and salt in medium bowl; set aside.

2. FOR THE FILLING: Adjust oven rack to upper-middle position and heat oven to 400 degrees. Cut half of pineapple into 1 inch pieces the other half into 1/4 inch chunks (3 apples into 1-inch pieces and slice remaining 3 apples into 1/4-inch-thick wedges. ) Bring pineapple pieces, apple juice, sugar, and cinnamon to simmer in 12-inch nonstick skillet over medium heat. Cover and cook, stirring occasionally, until pineapple pieces are tender, about 15 minutes. Transfer mixture to bowl and mash pineapple using potato masher. Reserve 1 tablespoon mashed pineapple mixture. Return remaining mashed pineapple mixture to skillet with pineapple chunks  and cook, covered, until chunks just begin to soften, 3 to 4 minutes. Off heat, stir in lemon juice.

3. Scrape pineapple filling into 8-inch square baking dish and press into even layer. Add reserved mashed pineapple to topping mixture, stirring until mixture appears crumbly. Sprinkle topping over filling and bake until juices are bubbling and topping is deep golden brown, about 25 minutes. Let cool on wire rack for 15 minutes. Decorate with fruit, I used cape gooseberries also known as Peruvian ground cherry.                                                                                                                                           Bon Appetit !


Skladniki na 6 porcji
 
kruszonka: 
2/3 szkladnki platkow owsianych ( nie blyskawicznych)                                                                               1 szklanka dowolnych orzechow, lub mieszanka
5 lyzek brazowego cukru , ja uzylam nektaru kokosowego
1/4 szklanki maki ( w moim przypadku orkiszowa) 
3 lyzki masla rozpuszczonego
1/2 lyzeczki cynamonu
1/8 lyzeczki soli
nadzienie:
1 swiezy ananas mozna uzyc jablek (6 duzych soczystych obranych ze skory i pokrojonych na czastki) 
1 szklanka soku anansowego lub jablkowego
2 lyzki cukru brazowego (nektar kokosowy lub ksylitol) 
3/4 lyzeczki cynamonu
2 lyzeczki soku z cytryny
1. kruszonka: zmielic 1/3 szklanki platkow owsianych w mikserze. Wymieszac zmiksowane platki  i pozostale platki, make, maslo, cynamon i cukier. odstawic na bok
2. nadzienie: rozgrzac piekarnik do 200C . Polowe pokrojonego anansa usmazyc z sokiem anansowy, cukrem i cynamonem okolo 10 min. Przelozyc miksture do miski i ubic tluczkiem do ziemniakow. przelozyc na patelnie i dodac druga polowe pokrojonego ananas, przykryc i gotowac do momentu kiedy kawalki zaczynaja byc miekkie. okolo 3-4 minuty. wylaczyc i dodac sok cytrynowy. wylozyc nadzienie na blaszke do pieczenia, na wierzch nalozyc kruszonke i piec okolo 25 minut. smacznego ! 
 

Winter apple pie

Greetings after a long break. 

I am getting my hands back into cooking and photography, and will be piling on many new recipes and pictures for you. 

In October, I joined Aran Goyoaga at her food and styling workshop organized in a beautiful Brooklyn loft. The loft is owned by another great photographer and foodie, Karen Mordechai, and her fabulous Sunday Suppers Club. I was very envious of the big windows, wonderful light, and long spacious marble counter tops.  Karen organizes dinners for her club members and occasionally has a food styling or food photography workshop at her great space. 

I learned about Karen through my Friend Kinga. It was not easy to get in to her workshop.  I had missed one opportunity, in April, but with Kinga’s help I was able to get on the waiting list for the next one and ta-da… I was in for the October class. 

The workshop lasted two days and was full of learning, eating, sharing pictures, styling, blogging and other fantastic experiences. I met wonderful people, who I hope to stay in touch with. 

Aran is a great teacher, very approachable, warm and sweet.  Her ability to style and take beautiful pictures is natural.  She is a self taught artist who came to the States from Spain (Basque country). Her blog, Cannelle Et Vanille, is a finalist of the James Beard award for 2012 and 2013 Best Individual Food Blog. I came out from this workshop feeling like a new person and hopefully learned some new food photography tricks. I look at food and light from a different perspective now and will recommend her workshop to anyone.

We have photographed a lot of different objects and dishes; one of them was Aran’s apple pie. The recipe I tried at home is a little different from the one Aran used, but I can assure you it is as delicious and gluten free as Aran’s. 


Recipe
I've become a bit more hesitant to use nut-flours for baking, since exposing them to high temperatures causes them to oxidize, so I'm  trying out more recipes with coconut flour.
For the crust:
1 cup coconut flour
1/4 cup butter, soft ( you can use ghee)
3 eggs
2 tbsp coconut oil
1/2 cup shredded coconut
punch of salt
1 tbsp water
1 tbsp honey
Mix all the ingredients together, best way is to just use your hands. If the dough is a bit crumbly, add some water, but note that it will be a bit drier than regular dough
Next, peel and cut up about 5 apples, and add the following:

2/3 cup erythritol  
2 tbsp lemon juice
1/4 tsp nutmeg
1/4 tsp ground cloves
2 tsp cinnamon
2 tbsp melted coconut oil
Roll out pie crust into large circle and place it on large baking sheets. Place the apple mixture on the crust and fold over the edges of crust so that it covers 2 to 3 inches of the apple mixture . No need to be artistic – the more rustic the better Last, spread some egg white over the top and bake in the oven on about 180C (350F) for 50 mins.


Przepis
ciasto:
1 szklanka maki kokosowej
1/4 szklandki masla , w temperaturze pokojowej lub ghee
3 jajka
2 lyzki oleju kokosowego
1/2 szklanki wiorek kokosowych
Szczypta soli
1 lyzka wody
1 lyzka miodu
Wymieszaj wszystki skladnki, najlepiej uzyc do tego rak, jesli ciasto jest za bardzo kruche, dodaj wody, ale powinno byc troche bardziej suche niz tradycyjne ciasto. 
Nastpenie obierz okolo 5 jablek, I dodaj : 
2/3 szklanki eryterolu
2 lyzki soku z cytryny
1/4 lyzeczki galki muszkatulowej
1/4 lyzeczki startych gozdzikow
2 lyzeczki cynamonu, 
2 lyzki oleju kokosowego
Rozwalkuj ciasto w ksztalcie duzego kola I poloz na papierze do pieczenia. Najlepiej walkowac juz na papierze. Przeloz jablka na spod ciasta I zagnij rogi ciasta tak zeby zakrylo 5 do 6 centymetrow pozostawiajac srodek odkryty. Wierzch mozna posmarowac bialkiem I piec w 180 C przez 50 min. 
 

berry panna cotta

My house is located an ideal location in long island (not to brag about it), but I am very fortunate. On one hand, about 10 minutes drive, I have an open ocean with beautiful empty beaches … on the other hand I am close to the north fork with its casual wineries, plenty of green, lush farms. Best of all it’s only 1,5 hours from the city, which is the big bonus when you travel every weekend and have to sit in the Hamptons traffic

Visiting  farms is a great option on a “ not so beach weather “ day. A lot of them have the “pick your own” option.  I love good deals and picking my own produce again provides me with the best of both worlds. Last week I decided to get blueberries. The day was hot and humid and I didn’t last long, My dog was especially suffering, laying down under each bush of blueberry trying to get some shade without the benefit of picking or at least eating the berries…and on top of that he got his face covered in cling-ons that were very hard to pick from his hair. Overall the visit was successful, I came back with plenty of blueberries, some blackberries which are just starting to get ripe, and a little bit of raspberries, which are almost out of season. I completely snoozed the season for this delicious and beautiful fruit.

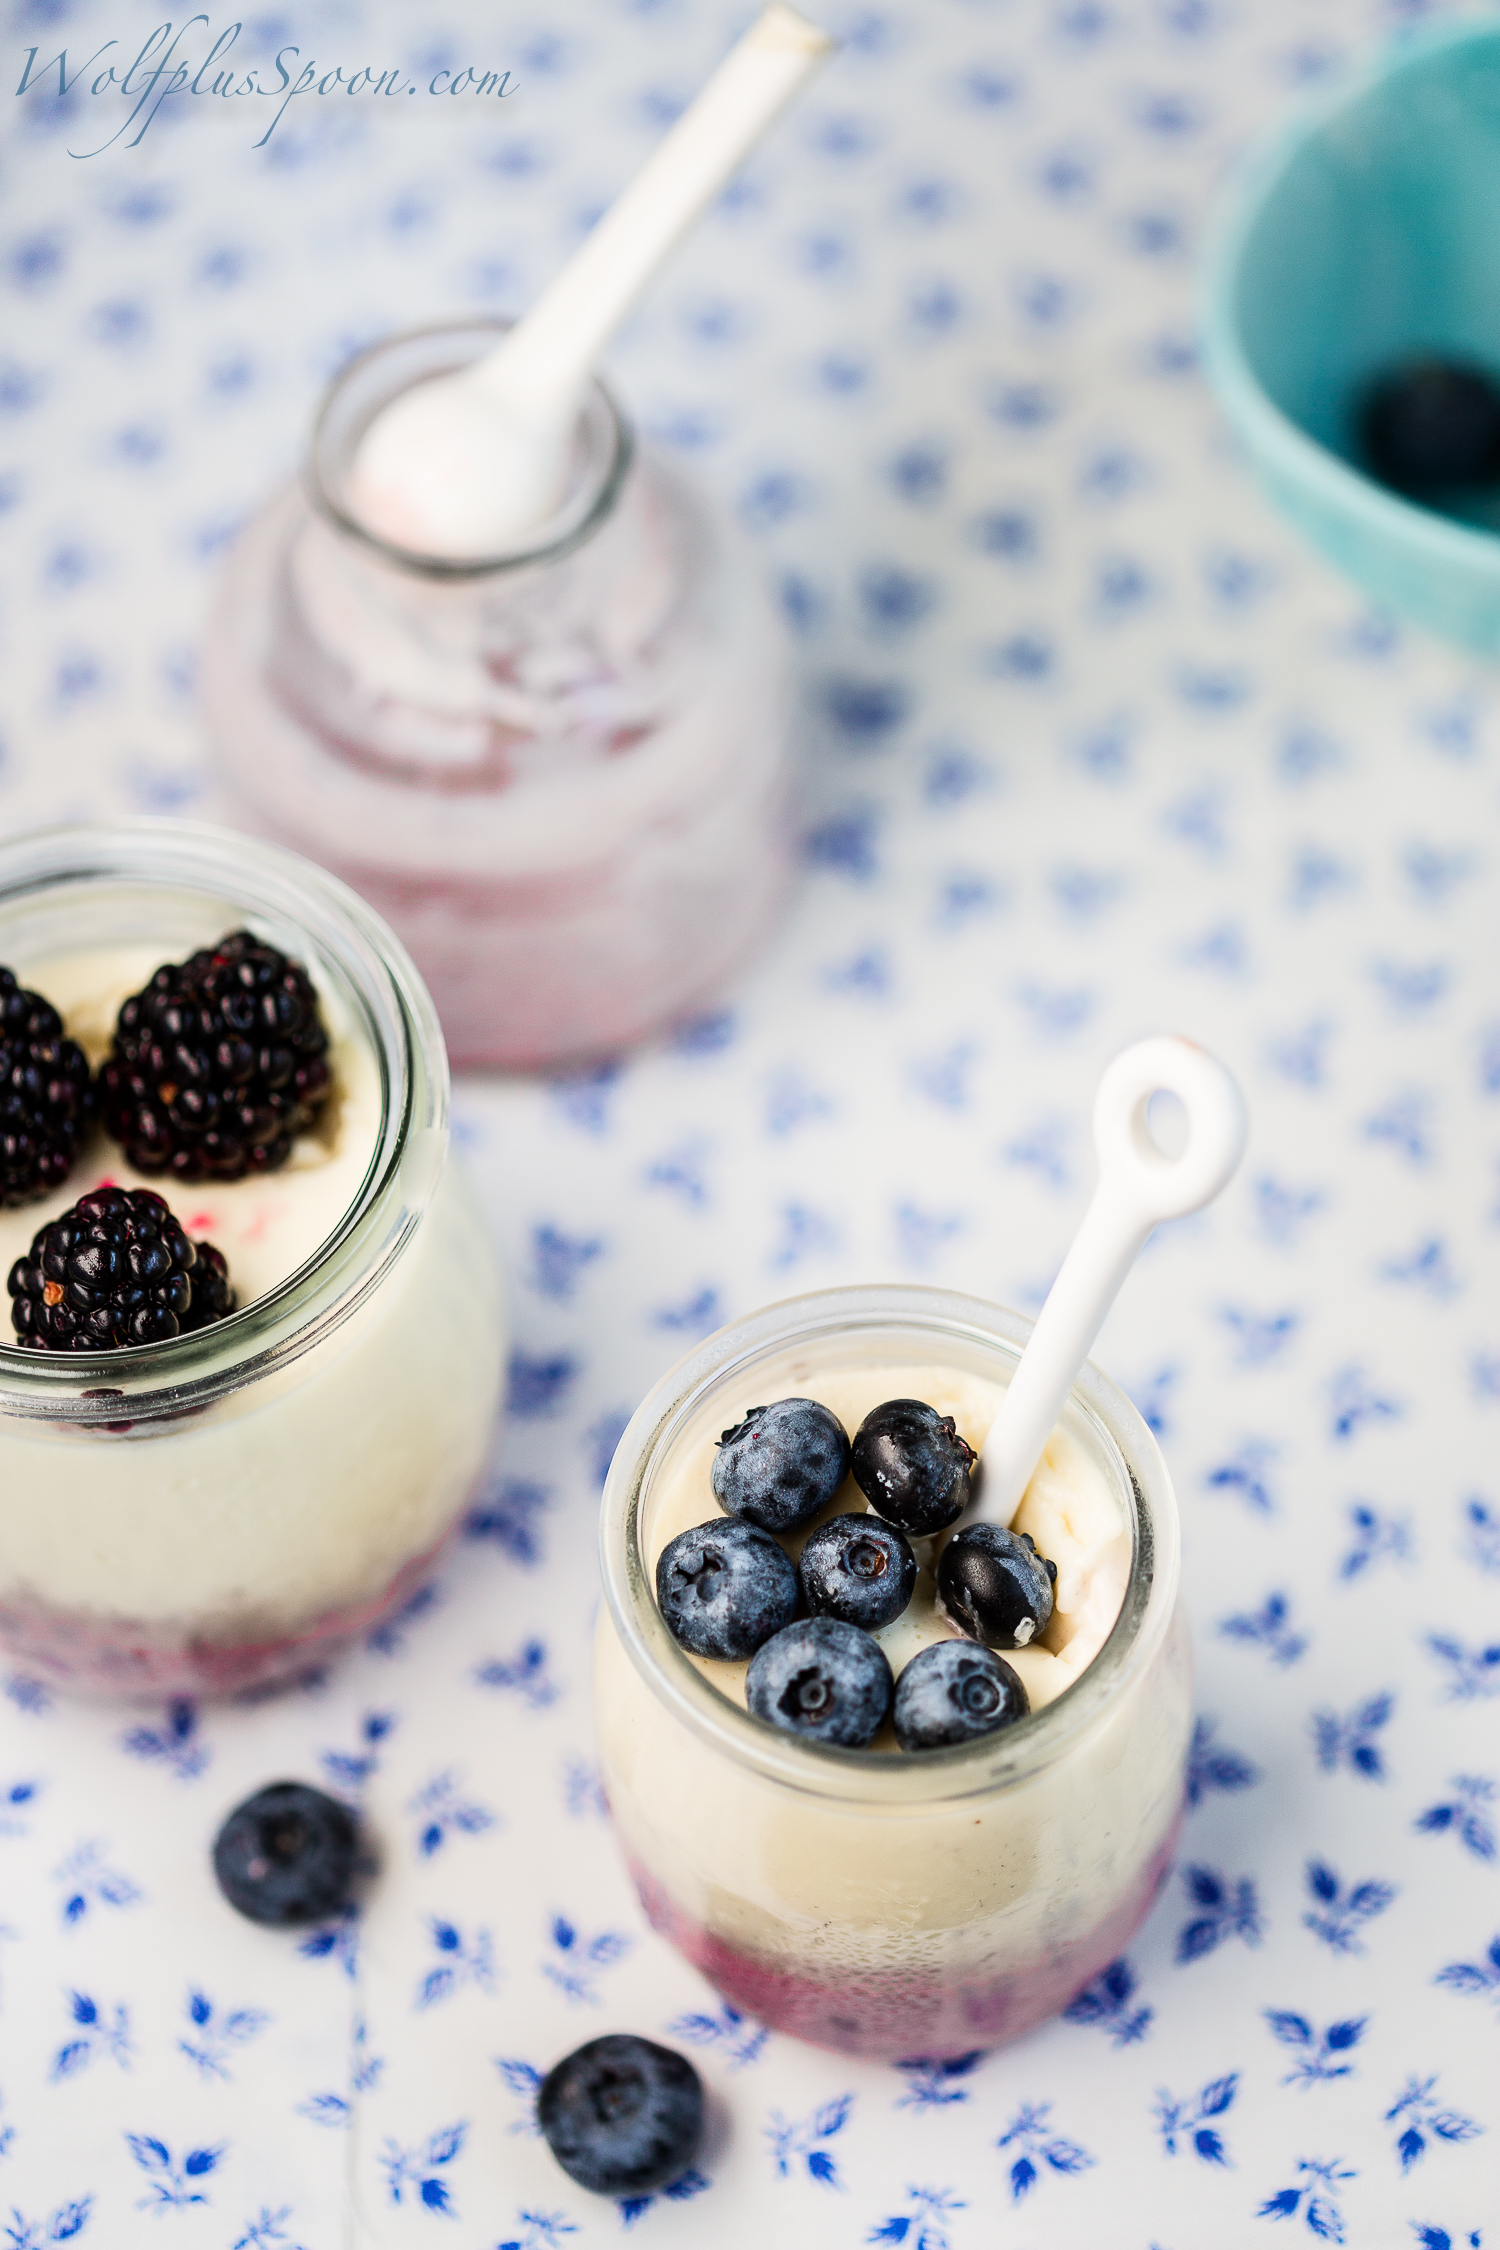
 I had a hard time coming up with an idea for a good skinny dessert using these berries.  I decided on berry Panna Cotta, incredibly easy to make italian dessert, and if it takes you more than five minutes to make, you are doing something wrong. That is the beauty of italian cooking: it’ straightforward and almost effortless in its simplicity. Popular italian saying is: ”spend more time shopping and less time cooking”.   

My last Panna Cotta was a fiasco… not very tasty and looking rather grainy and not smooth and creamy as it should be. I tried to cut the richness of panna cotta and swap the heavy cream with milk and the results were very disappointing. This time I mixed milk and heavy cream; I let the cream cool for a while before I mixed in some yogurt.  I think this combination is the best if you want to cut some calories and not compromise the taste and look of this fool- proof dessert. I served this batch with a pile of berries, very juicy and lightly sweetened with a whisper of citrus. But if berries are not in season you can make it with lemon or lime, gooseberries or just drizzled with a bit of honey. The best Panna Cotta is made in advance make it few days before and keep it well covered in the fridge. 

Recipe

2 cups of heavy cream 

1 cup of milk

1 cup of greek yogurt 

1/2  cup (100g) sugar or equivalent of stevia 

2 tsp of vanilla extract, or 1 vanilla bean, split

lengthwise

2 packets powdered gelatin (about 4 ½ tsp)

6 tablespoons (90ml) cold water

Heat the heavy cream, milk and sugar in a saucepan. Once the 

sugar is dissolved, remove from heat and stir in the vanilla

extract. Sprinkle the gelatin over the cold water in a medium-sized bowl and let stand 5 to 10 minutes.

Pour the very warm Panna Cotta mixture over the gelatin and stir until the gelatin is completely dissolved.

After 5 minutes mix in the yogurt 

Lightly oil eight custard cups with neutral-tasting oil.

Divide the Panna Cotta mixture into the prepared cups, then chill them until firm, which will take at least two hours but I let them stand at least four hours. 

Run a sharp knife around the edge of each Panna Cotta and unmold each onto a serving plate, and garnish as desired.


Przepis

2 szklanki slodkiej smietany

1 szklanka mleka

1 szklanka jogurtu greckiego

½ szklanka cukru, lub ekwiwalent stewi

2 lyzeczki olejku waniliowego

2 saszetki zelatyny ( okolo 4 ½ lyzczeki

6 lyzek zimnej wody

Podgrzac mleko I smietane w sredniej wielkosci garnku, dodac cukier  olejek, mieszac dopoki wszystko sie nie polaczy. Rozmieszac zelatyne w zimnej wodzie I odstawic na 5 min.  Wymieszac  goracy krem z  zelatyna . Po 5 minutach dodac jougrt I wymieszac do momentu uzyskania jednolitego kremu.  Przygotowac foremki, smarujac je lekko olejem ( najlepiej bezsmakowym. Wlac krem do foremek I odstawic do lodowki na kilka godzin. Przed podaniem przejechac ostrym nozem po krawedzi foremki aby latwiej bylo wyjac panna cotta. Podac na talerzu z wybranym przybraniem, jogdami , malinami, lub miodem.


avocado cake

I love to cook, but I am not a good baker. My son on the other hand is a great judge of my efforts. A kid growing up in NYC has to be a foodie... and so he is. Since he was little I introduced him to different cuisines, and now he will eat pretty much anything. Of course polish dishes especially the ones cooked by mom (not my healthy versions of them ) take a special place in his heart and by far are his favorites.


To please my sweet tooth and my fixation on cutting flour, sugar and general unhealthy products out of our diet I researched the Internet and came across the healthy avocado cheesecake. Don't be fooled by the name... this cake does not taste anything like cheesecake, simply because it doesn't contain any dairy, but if you like avocado you will love it. Not only is it guilt free, it's super healthy. I have substituted a few ingredients and made my own version of it.

Instead of pecans and coco nibs I used sprouted almond and chunks of coconut. I also didn't use honey which the recipy was calling for but xylitol natural sweetener, which doesn't raise blood sugar level.
The best part for me was that you don't have to measure everything like in a regular baking recipes. It's more about tasting, adjusting and finding your own taste .
My son was semi pleased with it. " not bad " , which is pretty good coming from him. I will definitely make this cake again, maybe changing the ingredients and taste a little bit next time to create a new cake. 
 

Recipe 

 base
almonds ( i used sprouted ) 125g /4 1/2oz

 coconut chunks ( or shredded coconut)  45g / 1 1/2oz

pitted dates (approx. 10)

coconut oil, melted and at room temperature, 2 tablespoons             

 filling
4-5 medium avocados

lime juice (about 4-6) I used 100ml / 3 1/2fl oz

coconut oil at room temperature,( i used 3 tbl spoons)  175ml / 6fl oz

1 tsp lime zest

xylitol or stevia, sugar or honey  (I used 100g / 3 1/2oz) if you using stevia use much less. you will have to taste the filling 

Preheat the oven to 150°C/300°F. Place the almonds on a baking-tray lined with baking-paper. Place in the oven for seven to eight minutes or until toasted, add coconut about 3 minutes before the time is up . Transfer almonds and coconuts to a food processor or a blender and add the rest of the base ingredients. Blend until the mixture is crumbly (don’t let it go completely smooth). 

I used  round cake tin 7" - 8" Line the base of the tin with parchment paper  Press the base mixture down firmly and evenly with your finger tips or spatula. Chill the base in the fridge while you preparing the filling. 

Place all of the filling ingredient in a food processor or blender and mix until is smooth and creamy. Add more "sugar" or lime juice if needed. Pour the filling into the tin and refrigerate it for few hours. 

przepis

spod

migdaly ( ja uzylam skielkowane) 125g 

kawalki kokosa, lub wiorki kokosowe 45g 

daktyle ( okolo 10)

olej kokosowy nierafinowany w temperaturze pokojowej 2 lyzki

masa ciasta

4-5 dojrzalych awokado

sok z limonek 4-6 okolo 100ml

xylitol, stevia, miod lub inny slodzik naturalny okolo 100g, jezeli uzywasz stevia to uzyj zdecydowanie mniej, najlepiej probowac podczas mieszania

olej kokosowy nierafinowany 175g , ja uzylam okolo 3 lyzek. 

Nagrzej piekarnik do 150C 

Wysyp migdaly na plaska blaszke wylozna papierem do pieczenia i piecz przez okolo 8min albo do momentu kiedy migdaly sa zarumienione. na okolo 3 minuty przed koncem dodaj kokos.  Wsyp migdaly i kokos do blendera , dodaj pozostale skladniki i zmiel na mase - nie za mocno aby pod palcami byly wyczuwalne male grudki , ktore latwo sie kleja.  Wyloz mase na  mala tortownice 17- 20cm wyscielona uprzednio papierem do pieczenia i ugniec mase do spodu tortownicy tak aby byla rownomierna, wsadz do lodowki do czasu zrobienia masy.  W robocie kuchennym lub blenderze, zmiksuj wszystkie skladniki na jedolita, kremowa mase  i wlej na spod tortownicy . Wygladz delikatnie, chlodz przez kilka godzin. Przed podaniem ostrym nozem obrysuj krawedz tortownicy- ulatwi to wyjecie ciasta z formy. Nie polecam przechowywac dluzej niz 2 dni. 


Source: 2015/5/12/avocado-cheesecake